How To Make Orecchiette Step By Step
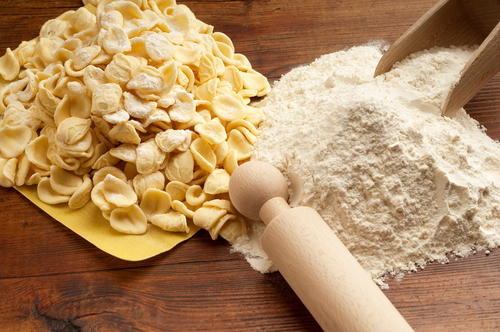
Orecchiette pasta resemble little ears, which is where they get their name. This unique pasta shape can be found across Italy, but is traditionally a typical pasta of Puglia. Although there are many variations of ingredients used to make this pasta, traditionally it is made simply with a combination of fine semolina flour and water although I found I prefer to add a little regular flour into the mix as well.
Having just returned from a week in Puglia I was very interested in tackling this pasta myself once I returned home after having watched old Nonna’s pulling a knife across the little pasta discs and making orecchiette by the hundreds in mere minutes. Unfortunately, I found it took me a little experimentation to get the dough stiff enough to hold it’s shape when pulled, and the technique itself takes a little practice in order to form the orecchiette evenly but once you’ve got it you can work very quickly.
I tried using a knife as I saw many ladies in Puglia doing so, but found it easier to simply use my thumb to pull the dough into an ear shape. Don’t worry if your orecchiette aren’t perfectly shaped as the irregular shape adds to it’s rustic charm. I’ve made this pasta myself three times now and have found it gets easier each time. Ideally, you want the orecchiette to be of even size so they are all perfectly cooked at the same time, but as long as they are close I wouldn’t worry too much about it.
A perfect orecchiette is about 3/4 of an inch across and slightly domed shaped which enables them to hold pasta sauce well. The method used to make them creates centers that are thinner than their rims, a characteristic that gives them an interestingly texture, soft in the middle and somewhat more chewy outside when cooked “al dente”.
Ingredients
2 Parts Semolina ( I Used 1/2 Pound)
1 Part All-purpose Flour (I Used 1/4 Pound)
Warm Water
Simply mix the two flours together and then begin to add warm water mixing until you obtain a stiff dough. Once you obtain a workable dough, knead on a lightly floured surface for 10 to 15 minutes until the dough is very smooth and stiff. Wrap in plastic wrap and refrigerate for a minimum of 2 hours or up to 8 hours. Remove the dough from the refrigerator and follow the steps below.

The semolina flour I found worked best.

Mix together two parts semolina flour with one part all-purpose flour and add just enough warm water to make a smooth dough. Knead for 10 to 15 minutes on a lightly floured surface until the dough is very smooth and stiff. Wrap in plastic and refrigerate for a minimum of two hours.

Take the dough from the refrigerator and break off a small plum sized ball. Using a well floured textured surface, roll the ball into a tube about 1/2 to 3/4 of an inch thick.
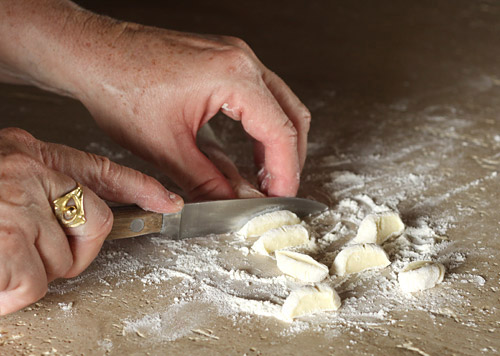
Use a sharp knife, cut the tube into 1/4 inch discs, keeping the dough well floured as you cut.

Use your fingers to lightly push the discs back into a rounded shape if needed
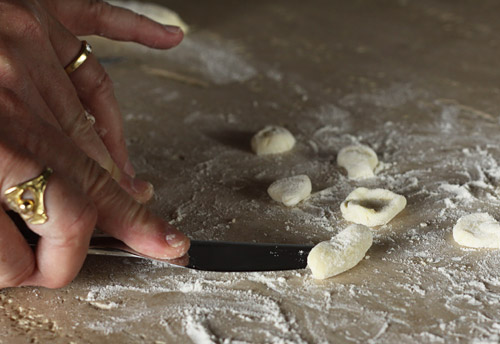
One method of shaping the orecchiette is to place the side of a knife at the top of one of the discs and to gently and quickly pull the knife across the disc of dough letting it wrap up over the knife creating an ear shape. Gently use your fingers to help open it up if needed. This works best if the dough is quite stiff, and both the knife and dough are well floured to prevent sticking.
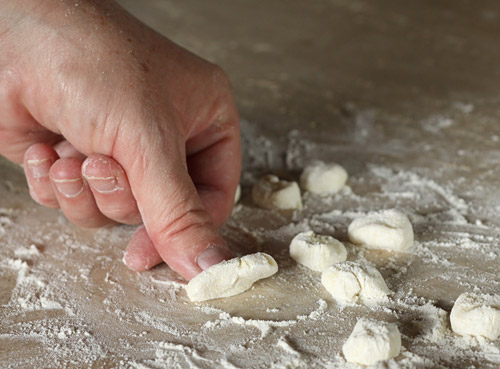
The method I prefer for shaping the “ears” is to place my floured thumb at the top of the disc and using a little pressure pull it across the disc creating the ear shape. This works best if you continually press your thumb into flour before you shape.
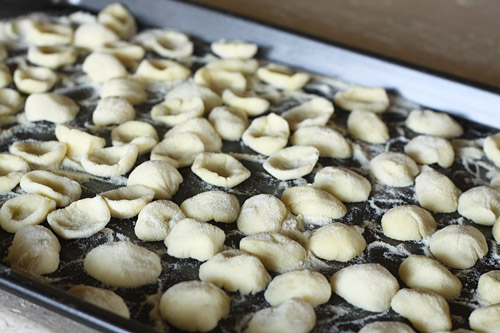
Place the prepared orecchiette on a lightly floured tray until you are ready to cook them. To cook, simply drop them into a large pot of lightly salted water and cook until “al dente”. Cooking times will depend on how long you leave them to dry before cooking, but if you cook them within an hour or two of making them they will only take minutes to cook.
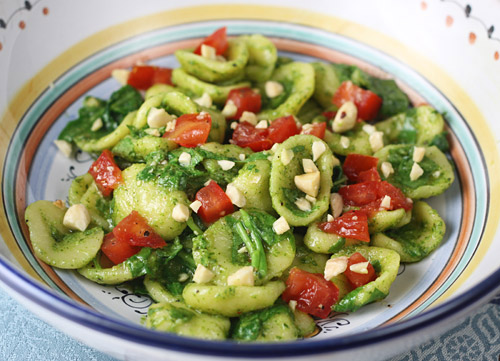
Once cooked, mix with your favorite sauce and serve immediately!
Deborah Mele
Morning Deb! I wondered if these dry well, and if you’ve ever used the Hodgson Mills Pasta Flour? It’s a 50/50 blend of semolina and hard wheat flour? I’ve used it for flat pasta with my Kitchen Aide pasta rollers and really liked it.
Fran, no I’ve never herd of Hodgson Mills Pasta flour but I will look for it and try it out.
Hi Deborah, Thanks for this recipe! I’m not sure if you still check older posts like this…I just made this pasta, and I’m wondering if you can give any tips on what went wrong. The noodles came out alright, but kind of tough (almost leathery) and kind of heavy. I tried another batch with less water in the dough, but it was even tougher. Do you know what I could be doing that would make the dough tough or leathery? Learning to make pasta without a teacher right next you is tricky!
On a more successful note, I paired this with the sauce you posted for gnocchi bolognese and added some eggplant, and it was divine.
The dough is fairly stiff to work with because you are using semolina flour, but it should cook up just fine. If you prefer a softer dough, replace some of the semolina with all-purpose flour. Glad you enjoyed the Bolognese sauce!
Just made the orchiette. Forgot to refrigerate the dough… Hope it turns out OK, they look OK. Gonna cook them tomorrow .
I made them yesterday and left them out on tray overnight to dry but did not cover them, then this morning I put them in a freezer bag until Im ready to cook them. Was it ok not to cover them overnight? why do they say cover with a cloth?
They should be fine.